PSV valve cannon.
-
MrCrowley

- Moderator

- Posts: 10078
- Joined: Fri Jun 23, 2006 10:42 pm
- Location: Auckland, New Zealand
- Been thanked: 3 times
According to the link about PSVs that dewey-1 posted in your original thread, the back of the piston should be larger than the inlet so as to keep the valve seated. Perhaps your valve isn't meant to operate in the same method as the PSVs discussed in that link. One way around this would be to find a pipe that fits inside the seat of the valve, cut of a piece only 1-2cm in length, and epoxy it inside the seat so that only 2-3mm of the pipe is raised above the seat.
This will decrease the area of the piston that the inlet pressure can act on and, if the inside diameter of the new seat is smaller than the diameter of the back piston, you should be able to hook up your chamber to the pilot so you only need 8bar in the pilot when there is 8bar in the chamber.
If you find the right size pipe, it should be an easy fix. You might lose a bit of performance due to the slightly reduced flow through the valve but this may outweigh the annoyance of having to fill the chamber and pilot separately and at different pressures.
- Attachments
-
- red represents the piece of pipe epoxied inside of the seat to reduce the seat diameter
- naamloos_564.jpg (17.29 KiB) Viewed 3899 times
-
Alex345
- Specialist

- Posts: 137
- Joined: Sun Jun 13, 2010 3:26 pm
- Has thanked: 2 times
- Been thanked: 1 time
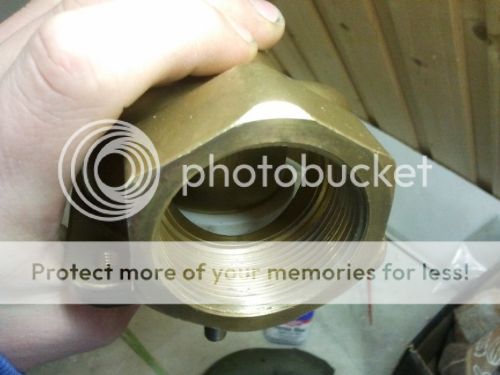
Getting a bit confused now xD If the "seat" is the hole where the air comes trough and the "back" of the piston is the PTFE disc that pushes down on that hole to seal it, then it's bigger than the seat.
I took a picture to be sure
I took a picture to be sure
-
MrCrowley
- Moderator
- Posts: 10078
- Joined: Fri Jun 23, 2006 10:42 pm
- Location: Auckland, New Zealand
- Been thanked: 3 times
Sorry, when I've been referring to the 'back' of the piston, I mean the smaller piston disk inside the pilot housing.Alex345 wrote:the "back" of the piston is the PTFE disc that pushes down on that hole to seal it, then it's bigger than the seat.
We're only concerned with two parts of the piston here: the part that seals the seat and is acted on by the pressure in the chamber (the 'front' of the piston), and the part inside the pilot housing that is acted on by the pilot pressure (the 'back' of the piston). The key is to make sure that the cross-sectional area of the 'back' of the piston is larger than the cross-sectional area of the 'front' of the piston.
Say the seat is 47mm in diameter and the back of the piston (where the pilot pressure pushes against the rear piston disk) is 43mm in diameter, then at 120PSI (in both the chamber and pilot), the front of the piston will have ~320 pounds of force pushing against it and the back of the piston will only have ~270 pounds of force pushing against it. Thus, the valve will not remain closed and your valve will open. This is why you've had to put 12bar in the pilot when there's 8bar in the chamber. To get around this, you need to make the seat smaller. As you can see from the above calculation, making the seat smaller in diameter by only 4mm may be enough to keep the valve closed when there is 8bar in both the chamber and pilot.
Last edited by MrCrowley on Sat Mar 02, 2013 8:46 pm, edited 1 time in total.


If you would answer my PM questions it would be much easier to explain and understand in a true diagram not the one that is confusing due to upper and lower pistons the same diameter.Alex345 wrote:Getting a bit confused now xD If the "seat" is the hole where the air comes trough and the "back" of the piston is the PTFE disc that pushes down on that hole to seal it, then it's bigger than the seat.
-
Alex345
- Specialist
- Posts: 137
- Joined: Sun Jun 13, 2010 3:26 pm
- Has thanked: 2 times
- Been thanked: 1 time
Ok now i get it! If you would have said top or bottom of the piston it would have been a bit more clear, to me at least 
I'm sorry dewey-1 i was going to reply but i'm having trouble finding my calipers, and whats an accurate CAD model when i can't provide the right sizes But when i find them i'll send you the dimensions!
Unfortunately because i thought that the "back" part of the piston was the "front" i drilled both holes last night. So if it turns out that making the seat smaller is not possible i will tap and plug the holes so the valve is not lost, no worries there
I'm sorry dewey-1 i was going to reply but i'm having trouble finding my calipers, and whats an accurate CAD model when i can't provide the right sizes
Unfortunately because i thought that the "back" part of the piston was the "front" i drilled both holes last night. So if it turns out that making the seat smaller is not possible i will tap and plug the holes so the valve is not lost, no worries there
-
Alex345
- Specialist
- Posts: 137
- Joined: Sun Jun 13, 2010 3:26 pm
- Has thanked: 2 times
- Been thanked: 1 time
So i plugged both holes, i know that keeping the valve closed using chamber pressure would be much more simple. But since i have easy access to HPA i don't have to suffer from that, if it ain't broke don't fix it
Sooo, does anyone have experience with building carriages for cannons?
Sooo, does anyone have experience with building carriages for cannons?
-
Alex345
- Specialist
- Posts: 137
- Joined: Sun Jun 13, 2010 3:26 pm
- Has thanked: 2 times
- Been thanked: 1 time
Triple post, don't know if anyone is even following this build anymore... But i built a carriage from a hand trolley, mounted the cannon and painted it.
I'm going to make it look like an artillery piece, i painted it field grey.
Still needs;
Mock armor plate: Already cut and painted, still needs to be attached.
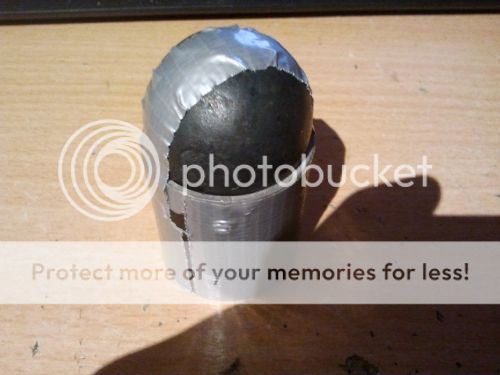
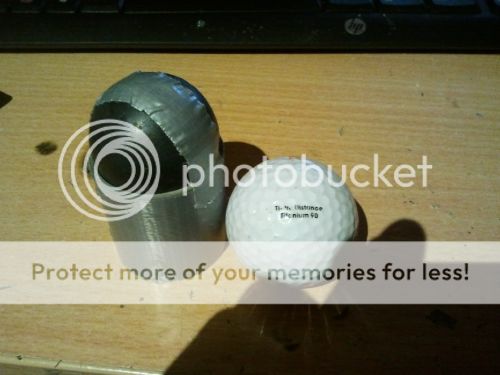
Golf ball barrel: Already made but still needs to be tested and painted.
Aiming device: I use a laser pointer for crude aiming but i would need to find something more accurate...
That's about it for now :p
I'm going to make it look like an artillery piece, i painted it field grey.
Still needs;
Mock armor plate: Already cut and painted, still needs to be attached.
Golf ball barrel: Already made but still needs to be tested and painted.
Aiming device: I use a laser pointer for crude aiming but i would need to find something more accurate...
That's about it for now :p
-
jackssmirkingrevenge

- Five Star General

- Posts: 26216
- Joined: Thu Mar 15, 2007 11:28 pm
- Has thanked: 576 times
- Been thanked: 347 times
Go on, pictures
For an artillery piece, surely something a bit more sophisticated is required:Alex345 wrote:Aiming device: I use a laser pointer for crude aiming but i would need to find something more accurate...
hectmarr wrote:You have to make many weapons, because this field is long and short life
-
Alex345
- Specialist
- Posts: 137
- Joined: Sun Jun 13, 2010 3:26 pm
- Has thanked: 2 times
- Been thanked: 1 time
Your picture is not working There will be a military convention here soon, lots of people selling obsolete optics for small arms and artillery alike
Tested the golf ball barrel at 7.5 bar against my old pc.

I'm going to paint it now and attach the fake armor plate today and post some pics
Tested the golf ball barrel at 7.5 bar against my old pc.
I'm going to paint it now and attach the fake armor plate today and post some pics
-
jackssmirkingrevenge
- Five Star General
- Posts: 26216
- Joined: Thu Mar 15, 2007 11:28 pm
- Has thanked: 576 times
- Been thanked: 347 times
That is what I tried to link toAlex345 wrote:There will be a military convention here soon, lots of people selling obsolete optics for small arms and artillery alike
Impressive shot with the golf ball, surprised it didn't punch through given your launcher's specs. A harder pointer projectile would have made it through with ease, have you thought of making some custom slugs?
hectmarr wrote:You have to make many weapons, because this field is long and short life
-
Alex345
- Specialist
- Posts: 137
- Joined: Sun Jun 13, 2010 3:26 pm
- Has thanked: 2 times
- Been thanked: 1 time
The motherboard was in the way as well, it cracked it and knocked off the heat sink and CPU Maybe at 10 bars it would punch trough, i'll have to do some more testing
I have at least one custom round ready.


Gotta love the natural concave space that candle wax makes when it hardens
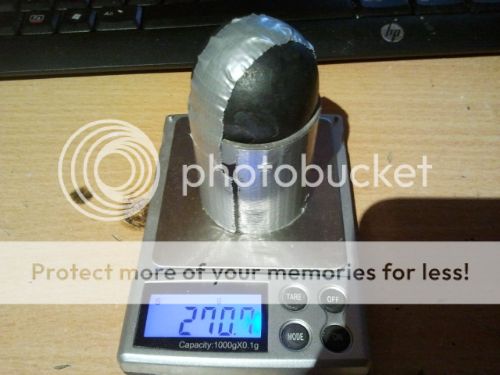
Problem is that this was the only iron ball i could find... This one will be fired at 10 bars with the original steel barrel because i don't trust the PVC golf ball barrel with those kind of forces.
Some pictures of the actual cannon coming soon!
I have at least one custom round ready.
Gotta love the natural concave space that candle wax makes when it hardens
Problem is that this was the only iron ball i could find... This one will be fired at 10 bars with the original steel barrel because i don't trust the PVC golf ball barrel with those kind of forces.
Some pictures of the actual cannon coming soon!
-
jackssmirkingrevenge
- Five Star General
- Posts: 26216
- Joined: Thu Mar 15, 2007 11:28 pm
- Has thanked: 576 times
- Been thanked: 347 times
That explains it, circuit boards are tougher than you think! Unsupported sheet metal should be penetrated easily.Alex345 wrote:The motherboard was in the way as well, it cracked it and knocked off the heat sink and CPU
Nasty! With a carefully prepared backstop you should be able to retrieve and reuse it many times.I have at least one custom round ready.
That duct tape is not going to hold it though...
hectmarr wrote:You have to make many weapons, because this field is long and short life
-
Alex345
- Specialist
- Posts: 137
- Joined: Sun Jun 13, 2010 3:26 pm
- Has thanked: 2 times
- Been thanked: 1 time
I would have to come up with a strong backstop then, the tape is basically to hold the ball in place during handling and loading. The back part is only there because the ball is a little too small for the barrel, so i don't mind if they separate during flight
-
Alex345
- Specialist
- Posts: 137
- Joined: Sun Jun 13, 2010 3:26 pm
- Has thanked: 2 times
- Been thanked: 1 time
It's been a while but i finally got some footage of this beast in action for you guys Enjoy!
[youtube][/youtube]
Shame about the strange "ripple" effect throughout the video... Could be caused by converting the files to .AVI but the video looked perfect during the timeline preview :S
[youtube][/youtube]
Shame about the strange "ripple" effect throughout the video... Could be caused by converting the files to .AVI but the video looked perfect during the timeline preview :S